Finished pictures first: That’s what everyone *really* wants to see.
I’ve been meaning to put this out for a while, since I’ve now confirmed the thing actually works. It’s really not much more than an explanation with pictures of how to build a mid-spec’d gaming PC, but hopefully this proves educational for some.
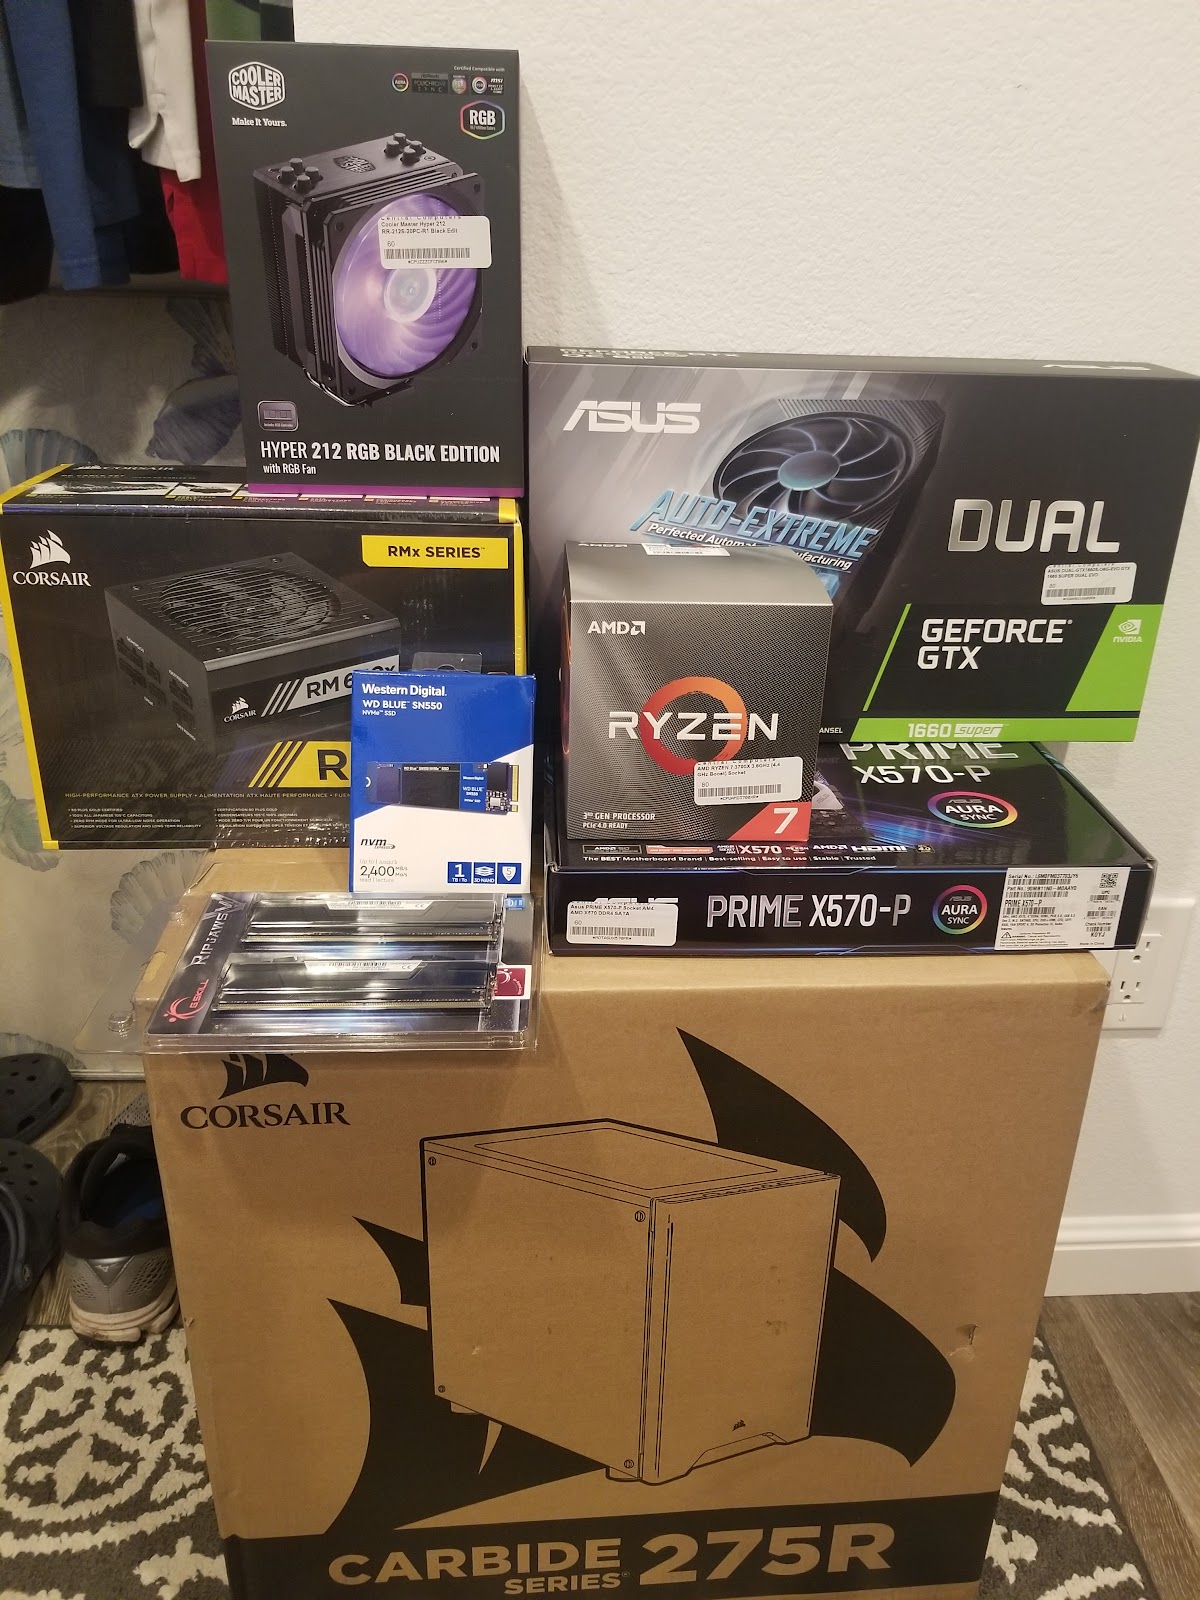
The Parts:
https://pcpartpicker.com/list/B3n7zN is the formal list of components. I’ve since added some cheap LED strips, but those are entirely cosmetic. I had all the necessary peripherals and monitors already taken care of, so this is just the tower itself.
Overview:
- CPU: AMD Ryzen 7 3700X 3.6GHz (8 cores)
- GPU: Asus GeForce GTX 1660 Super (dual EVO OC)
- Motherboard: Asus Prime X570-P ATX
- 16GB generic RAM, fancy LED cooler fan, and 1TB M.2 NVME solid state drive
- Corsair 275R ATX Mid Tower Case, 650W 80+ Gold ATX power supply
Design Decisions & Notable Exclusions:
- I started off with a budget of $1000 and I slightly blew through it with the processor, but it ended up under $1200 all told and I have 8 cores for running VM’s instead of 6, which is one of my most computationally heavy workloads.
- The 1660 Super GPU is a budget card, but it was extremely highly rated for the spec-per-price ratio. It won’t be able to ray-trace for the genital clipping bugs in Cyberpunk like a 3080 can, but it’s an amazing card for the average PC gamer.
- Only storage is a 1TB SSD. There’s space to extend it with a massive spinning disk hard drive later if I need, but the only reason I would need more space than my half-TB laptop drive was installing the ~100 GB MS Flight Sim 2020.
- I could have gone up to 32GB of RAM, but I haven’t had the need for it with my current workloads, and the bays are there if I need it later.
- No AIO liquid cooling. That just seemed like extra work.
- No particular reason for going AMD over Intel, but I haven’t been disappointed so far.
Procurement:
I bought the majority of these parts from Central Computers (same-day fulfilment ftw) and got the power supply/RAM from amazon. Two days for prime shipping and one trip to the store for a ton of assorted boxes, I had a stack of parts waiting for the weekend.
The Build
It’s super tempting to just unbox everything and attempt to LEGO it all together, but there’s a process that’s better to follow. One of the most important things that I did was keep all of the screws, cables, and extra parts with the boxes they came out of. There’s a ton of extension points and customizations and it’s easy to mix up the screws from different boxes.
First start off with the case. Unbox it and figure out where the wires and ports are. Figure out where the power supply goes (in this case the small cavity on the bottom right), and where everything else plugs in. The case LEDs and USB wires are visible coming in from the top left here, and they’re going to need to plug into the motherboard at some point. There’s a pair of rubber wire gates in the center of the case behind the cables, and there’s two more similar wire gates going vertically from the PSU area into the main part of the case. Lastly figure out where the case fan wires are and get them out of the way for now.

After you get the case ready, take out the motherboard and figure out how to mount your CPU and CPU cooling accessories. If you’re using a fan that didn’t come with the CPU (easy and recommended), figure out what kind of mounting hardware you’re going to need for the heat sink. This was one of the most time intensive parts of the build because despite instructions, I had no idea wtf I was doing here. Thankfully I figured that all out *before* putting the CPU into the socket, and they make things pretty idiot proof these days.
Most modern CPUs have pins and the socket has holes. There’s generally a notch on a corner of the CPU and the socket: make sure to align these, and the CPU should drop right in. Lock it in with a small lever or any other kind of mechanism the motherboard has to hold the CPU in place.
Once you have the CPU in the socket, get out your thermal paste (most external fans come with paste, but it’s cheap if not). Put a small dab on top of the processor (about pea sized) and stonk the heat sink on top. Make sure to put all of the screws into the heat sink mount and *then* go back to tighten each one. You want the pressure to be applied somewhat evenly so the compression spreads out the thermal paste evenly across the CPU surface. That’s what gets the heat off the CPU and into the metal of the heat sink, so messing that part up will have performance impact.

After I had the heat sink on, I mounted the fan onto the heat sink. I don’t actually recommend doing this until your mobo is seated in the case because it gets a little cramped in there. I had to take the fan off and put it back on after mobo installation because the screws were in weird spots and my hands are too big.

Drop the motherboard into the case. This step is a lot of picking through the tons of screws in all of the bins to figure out which pins go in which holes. Also watch out for the heat sink’s edges. I cut one of my fingers on the blades when I was trying to get the top left corner screws in. Notice here we can start to see where the ports are on the motherboard and we can start figuring out which cables will need to go where.

Once the mobo is seated nicely, you can plug in the GPU to it’s PCI-e expansion port. The 1660 Super is hefty but not overly so, and it fits well into this case. You’ll need to pull off a few of the metal brackets from the case to allow access to the video out ports (left side of the card in this picture), just keep these and all other spare parts with the case box.

I chose to install my hard drive after the GPU (the little blue Western Digital chip). This was fine in my case but it turns out there was another M.2 slot under the GPU, so if I had more stuff to put there I would have had to rip out the GPU to access it. M.2 ports and cards are *tiny* so it was a little hard to see where it went before I pulled it out of the box. But I learned, and now you know, too.

Once all of the junk was in it’s place, it was time to install the PSU and run all of the wires. This was the longest step because you have to:
- Figure out which cables you need for the modular power supply (read all of the mobo / GPU / other manuals to figure out what ports they have)
- Plug those cables in and slide the PSU into its bay. Screw it in (again, there’s a *ton* of screws that look like they fit here, try to keep them with their intended part)
- Carefully run the wires so they stay mostly in the back of the case, only poking out to run to the components they serve.

Cabling result seen here. Notice the main 24-pin power connector went directly in through the middle, as did the GPU power. Both of these plug in on the right side of the mobo / GPU, so the cabling was fairly neat. The USB header came in on the middle as well (plus in near the 24-pin), and the case button cables went in through the middle pointing down. The cable coming from the bottom up to the left is the case audio (no idea what that even does), and lastly there was an aux power connector that ran all the way up the back of the case to the top left corner below. That one was a pain to plug in because of the heat sink, but it’s barely noticeable here. I’m pretty happy with how the wiring came out, and since all of the cables are black nothing really looks out of place.

The scariest part of the build came next, I had to plug it in, flip on the PSU, and hit the power button. Thankfully none of the magic smoke came out and I got a bios screen when I plugged in an HDMI cable.
I burned a bootable USB stick with a Windows 10 image and ripped the product key from my laptop. Each key is good for ~5 uses or so, and I’m on ~3 with this one. A few bios pokes and a reboot later, it booted off the USB stick and installed windows to the SSD.

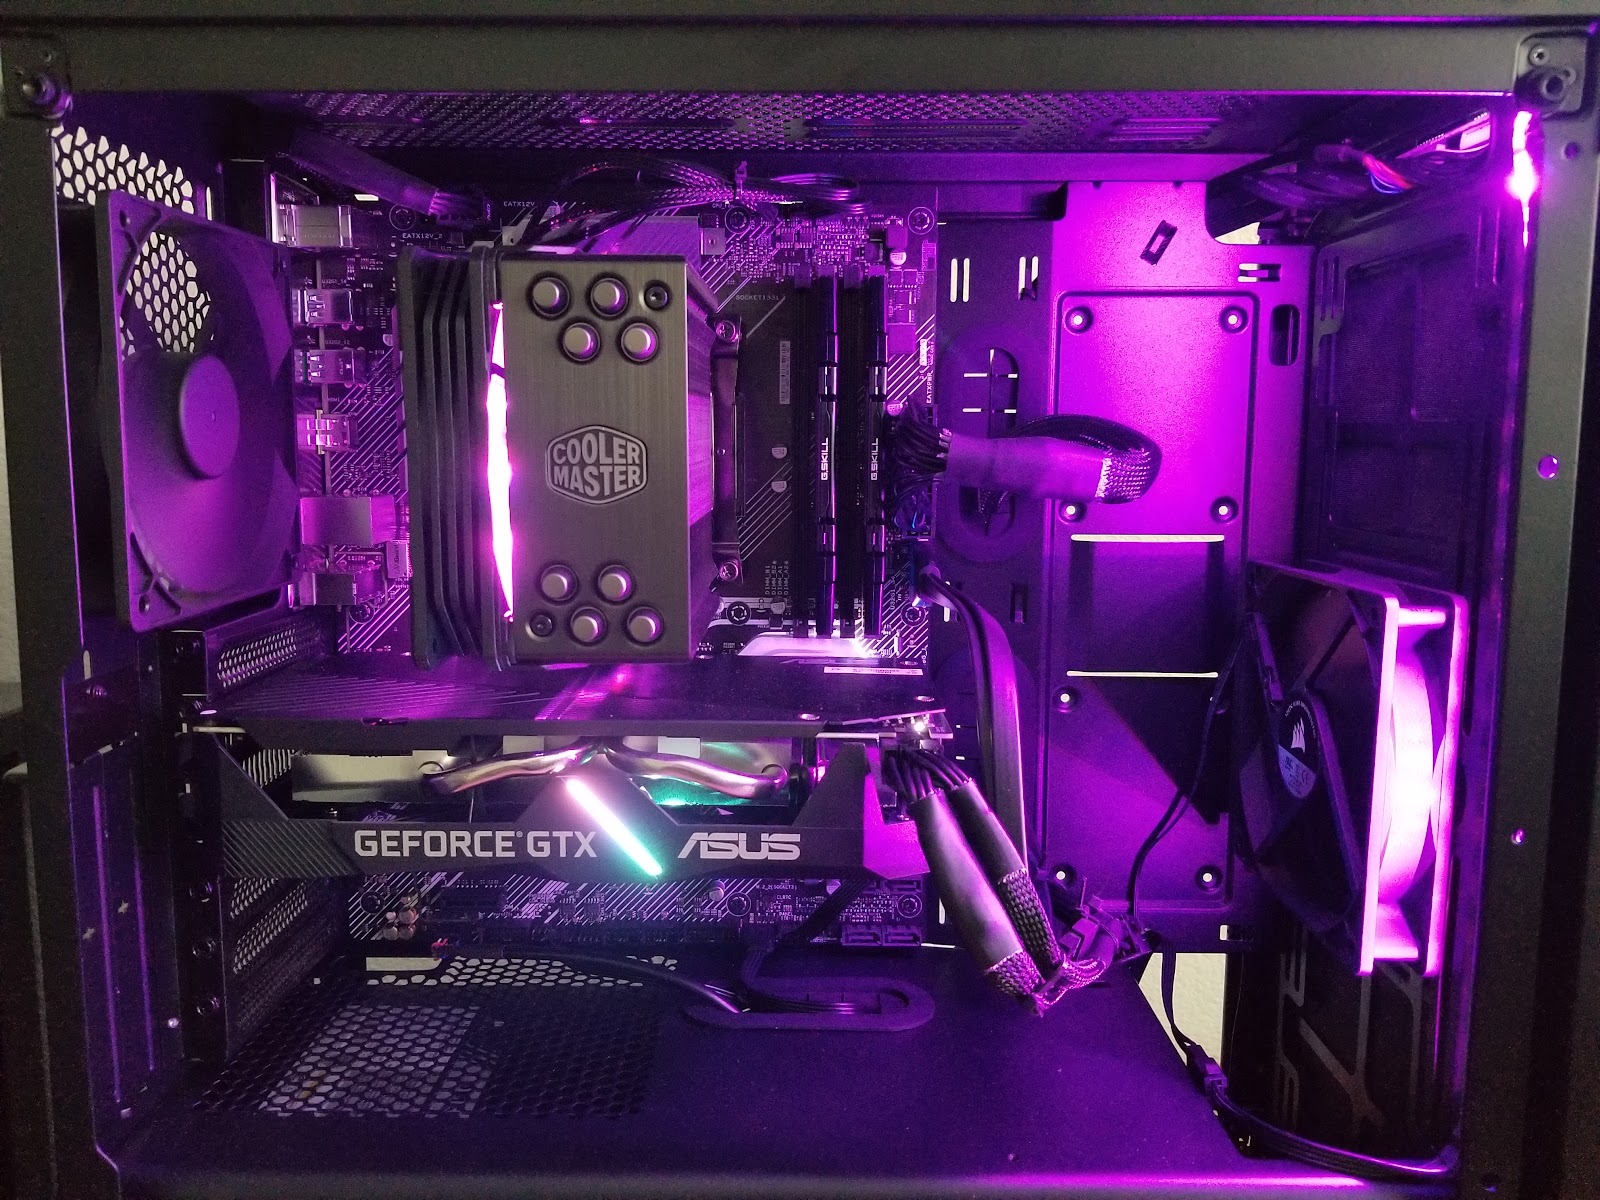
Once I knew that the important parts worked, I ordered and installed some LED’s to the case. Turns out they shine with the brightness of 1000 suns, so I keep them unplugged for day-to-day use. They were cheap though, and they light the case up nicely for pictures!

Once everything is in place, put the glass back on the case. I spent a little extra for tempered glass instead of acrylic, and it has a really nice looking finish (that unfortunately phone pictures cannot capture). This is what it looks like day to day without the LED’s on. The GPU has a nice blue/purple glow strip and the fan cycles through RGB (the ASUS Aura Sync default pattern). It’s just enough lighting to look pretty and showcase the components, but not bright enough to be distracting in a dark office.

This was the carnage left behind after the build… oof.

The Result:
Overall it took the better part of a Saturday to get this all together, and the rest of it to port my data over from my laptop and get things installed. Battlestation picture is below with monitors and bias lighting and the whole kit.
If anyone is dealing with lots of eye strain during work or play, I highly recommend getting a Luminoodle to stick onto the back of your monitor. I normally keep it with a tasteful off-white to balance out the screen glare, but it can also do fun colors like this when you’re in the mood. Try playing horror games with red lighting behind your monitor – it totally adds to the experience.

It’s been ~4 months since the build and it’s been running great. My typical gaming habits are MS Flight Sim 2020, Rocket League, or 1-2 Eve Online clients with occasional OBS screen capture. The only other computationally intensive things I’ve done are, running Linux VM’s for programming and some lightweight video transcoding. Even with all of that, nothing has particularly strained the system, and I don’t feel the need to explore overclocking to squeeze more out of the hardware.
Post-Script
I’m by no means a professional at this. I just skated by with whatever I could remember from my A+ certification, some great advice and recommendations from friends (thanks to Kyle and Eric), and a metric sh*tload of Google searches. You can find my socials on the contact page if you have any questions about this build or are interested in making your own. I’m happy to answer any questions that I can!
Appendix A: Problems and Solutions
- This issue started after some OS update where the wired network driver gets into a bad state when waking up from sleep/hibernate. I then can’t connect to the Internet until after a full reboot.
- Temporary solution: Running the “windows network troubleshooter” selecting the ethernet NIC. This takes ~30 seconds and 3-4 clicks each time I power on the computer, but it works.
Full solution: Update the BIOS using the built-in Internet-enabled BIOS updater.Steps to do so: reboot, F2 to get into BIOS, Tools menu > bios updater. Select Internet option, reboot, go back to the tools menu, and select the BIOS you want it to update to. Needs some time to install and then another reboot, and the network card works as normal again. This took me from BIOS version 1407 to 3001.- Lol, that didn’t work. The REAL solution was to buy a dedicated Intel NIC (network interface card) and plug the ethernet cable into that, entirely bypassing the onboard NIC from the motherboard. $15 ish and it solved all my problems. Can’t believe it took me that long to finally do it.

Leave a comment